Setting up ESLint & Prettier in ViteJS
Learn how to set up ESLint & Prettier in your ViteJS project.

I recently migrated from create-react-app (CRA) to ViteJS, and as part of that, I set up ESLint and Prettier. In this article, I go through all the steps I took.
Let's get started!
1. Install dependencies
We need to install the following dependencies:
ESLint: Our main linter.
Prettier: Our main code formatter.
@typescript-eslint/eslint-plugin: An ESLint plugin which provides rules for TypeScript codebases.
@typescript-eslint/parser: A parser which allows ESLint to lint TypeScript source code.
eslint-config-prettier: An ESLint configuration which disables the formatting rules in ESLint that Prettier is going to be responsible for handling, hence avoiding any clashes.
eslint-plugin-import: Tells ESLint how to resolve imports.
eslint-plugin-jsx-a11y: Checks for accessiblity issues.
eslint-plugin-react: React specific linting rules for ESLint.
npm install eslint prettier @typescript-eslint/eslint-plugin @typescript-eslint/parser eslint-config-prettier eslint-plugin-import eslint-plugin-jsx-a11y eslint-plugin-react
Something worth noting - when I looked into getting ESLint to work nicely with Prettier, I searched across many open source projects and found these 3 kept popping up:
I kept wondering which I should use as I saw that some projects used all, both, or only one. In the end, I came across this answer on Stack Overflow which helped me understand which plugin was most suitable (eslint-config-prettier).
2. Configure ESLint
Now it's time to configure ESLint.
ESLint config file
First let's create the .eslintrc.js configuration file. I like to create mine as a javascript file so that I can add comments. Here's what it looks like:
module.exports = {
  extends: [
    // By extending from a plugin config, we can get recommended rules without having to add them manually.
    'eslint:recommended',
    'plugin:react/recommended',
    'plugin:import/recommended',
    'plugin:jsx-a11y/recommended',
    'plugin:@typescript-eslint/recommended',
    // This disables the formatting rules in ESLint that Prettier is going to be responsible for handling.
    // Make sure it's always the last config, so it gets the chance to override other configs.
    'eslint-config-prettier',
  ],
  settings: {
    react: {
      // Tells eslint-plugin-react to automatically detect the version of React to use.
      version: 'detect',
    },
    // Tells eslint how to resolve imports
    'import/resolver': {
      node: {
        paths: ['src'],
        extensions: ['.js', '.jsx', '.ts', '.tsx'],
      },
    },
  },
  rules: {
    // Add your own rules here to override ones from the extended configs.
  },
};
ESLint ignore file
Now we create an .eslintignore file. This is where we tell ESLint which directories and files to ignore. This is project dependent, but here's an example:
node_modules/
dist/
.prettierrc.js
.eslintrc.js
env.d.ts
Add a new script entry
In your package.json file, you can add a lint script entry to run ESLint from the command line.
  "scripts": {
    ...
    "lint": "eslint . --ext .ts,.tsx"
  },
Now run npm run lint to check for linting errors. If you don't see any, it might mean that there are none (lucky you), so make sure to purposely add one in order to test it out e.g declaring a variable without using it.
3. Configure Prettier
Now that we've taken care of ESLint, let's go ahead and create the prettierrc.js file. This is where we specify all of our Prettier formatting rules. Here's an example:
module.exports = {
  "trailingComma": "all",
  "tabWidth": 2,
  "semi": true,
  "singleQuote": true,
  "printWidth": 120,
  "bracketSpacing": true
}
Prettier ignore file
Similar to ESLint, we need to tell Prettier what files it should ignore by adding a .prettierignore file. Again this will depend on your own project, but here's mine:
node_modules/
dist/
.prettierrc.js
IDE integration
In order to take full advantage of Prettier, you should be using it with an IDE to format your code after you save a file. If you're using VS Code, you can install the Prettier extension. You can then set the following settings:
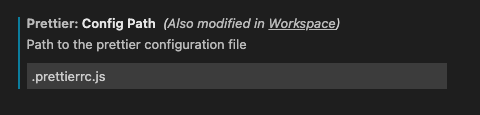


Or if you have access to the settings.json file, you can simply add these:
{
  "prettier.configPath": ".prettierrc.js",
  "editor.defaultFormatter": "esbenp.prettier-vscode",
  "editor.formatOnSave": true
}
Now, whenever you make changes to a file and save it, you should notice that Prettier auto formats it for you if needed. Pretty nice right? 😀
Automation
If you'd like, you can go a bit further and automate the linting and formatting process a bit. I like to use Husky which allows you to run your linter, tests etc. on a git commit/push etc. You can also then use pretty-quick along with husky to automatically format your code whenever you git commit, just in case someone on your team hasn't set it up in their IDE.
Want to see more?
That's it for today! I mainly write about real tech topics I face in my everyday life as a Frontend Developer. If this appeals to you then feel free to follow me on BlueSky. 🦋
Bye for now 👋